$14
delivery on most products**
$14
delivery on most products**
 24hr production*
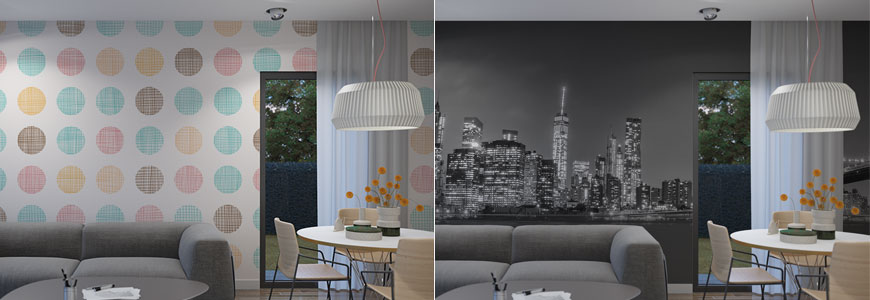
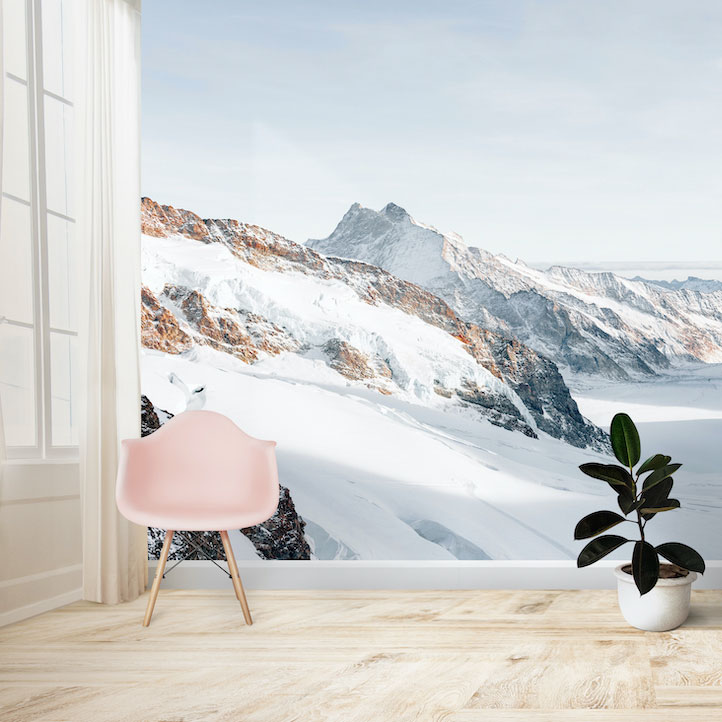
Think of the possibilities for a removable and re-usable Wall Stickers material! The PhotoTex™ material is printed in full digital color and can be easily removed, stored and used again and again! You can change your business promotion or bedroom graphic as often as you like - and you can install it yourself!
Most wall sticker vinyls have a permanent adhesive and need to be installed by a professional installer - to avoid bubbles and creases. The PhotoTex™ material has a removable adhesive and has been specially designed to be simple to install - so you can do it yourself instead of paying big money for professionals to install it. The lightly textured material gives the mural a beautiful matte finish and allows the bubbles and creases to be easily smoothed out with your finger. And one of the best things about it? If you have any problems during installation, you can just remove it and start all over again.
How do you self-install the PhotoTex™Wall Sticker?
Here are some suggestions to help with your installation of the PhotoTex™ material:
Step 1: Choose almost anywhere to display your promotions!
The PhotoTex™ material should be applied to a smooth, dry and clean surface. The most traditional places include any wall, door or window. When placing your PhotoTex™ on a standard painted wall, make sure the wall has been previously primed prior to painting (otherwise the paint or adhesive may come off). For newly painted surfaces, make sure you allow 30 days for the outgassing of the paint to preventing bubbling. Wash and wear and Teflon paints may not provide adequate adhesion for the PhotoTex™ material so you may want to test it first for a couple of days. Avoid placement above fireplaces. For larger areas, you can overlap the material (we supply multiple panels with an overlap) or butt it (as the material has minimal shrinkage or curl).
Step 2: Clean it before you stick it
Use a warm, damp cloth or sponge to clean the wall surface or window and allow it to completely dry. Make sure all previous cleaning solutions are completely gone. You can remove and replace the PhotoTex™ multiple times, however, as soon as it is removed, it should be stuck down to the original backing paper so the adhesive side of the material is not exposed to dust or dirt. Once the adhesive collects too much dust, dirt or fibers it will become less effective and the PhotoTex™ may not stick as well to your surface.
Step 3: Peel and stick it
Depending on the size of your PhotoTex™, it may be helpful to have two people to install it. Try not to let the adhesive come together, or let the PhotoTex™ fold up against itself. If it does stick to itself, you can separate it by carefully pulling it apart - and you may want two people to do this on larger graphics.
Start at the top of the PhotoTex™ material and pull down approximately 6” of the backing paper - then crease the backing paper so it stays down. Simply apply the 6” of the exposed adhesive area to your chosen location. Then you reposition the material until your full graphic is positioned correctly and square. Once the material is positioned correctly and square you continue to slowly pull the backing paper downward in 6” increments, smoothing the PhotoTex™ as you go. Depending on the size, it may be helpful if one person pulls down the backing paper, while the other person smooths the image onto the surface. You can use a felt squeegee to apply the PhotoTex™ and to smooth it out.
If there are any bubbles or wrinkles, you can lightly press or smooth them out, or just peel back that area and re-apply it.
Further suggestions:
If a bubble re-appears over the next day or two, pressing and lightly rubbing can remove it. This can occasionally happen if oil, dirt, or dust is on your surface. Use a sewing pin to pop the bubble, and then smooth it out with your fingers in a circular motion. In the very rare instance that bubbles keep re-appearing, you may want to move your PhotoTex™ to another area as there is something preventing the adhesive from sticking. Most causes of bubbles are because the wall was painted within the last 30 days or cleaning chemicals were used prior and not completely removed prior to installation.
DISCLAIMER: The above information is provided to help with the installation of the PhotoTex™material. The information is provided in good faith and is correct to the best of our knowledge. Easy Signs accepts no responsibility for any damage to property or loss of material during the installation. If the purchaser of the material has any concerns regarding self-installation they should contract a professional installation company to install the product.
We hope this information will help you with the installation of your high quality Wall Stickers